REUSABLE CLOTH MASK WITH FILTRATION LAYER
With the added filtration layer, this mask provides more protection than a simple cloth mask. This mask can be re-used after laundering.
Instructions for Making this Mask:
Remember a few things:
It doesn’t have to be perfect.
Keep everything as clean as you can. Wash your hands before working and clean your work surface. Place the masks in a clean plastic bag when you are done.
Don’t puncture the filter material with pins or sewing. Every hole lets virus penetrate and makes the mask less effective. Let’s get started!
Your Materials:
2 Pipe Cleaners
1, 8 ¼” Square of One Color
1, 8 ¼” Square of another Color (One is the inside of the Mask)
1, 8 ¼” Square of Filter Material
4, 16” (Up to 18”) X 2 ¼” Fabric for Ties*
2, 5” x 2 ½” Rectangle for Finishing the Ends of the Mask
Steps:
1. Make the Ties: Make 4 ties by folding the long side to the center of the rectangles, then fold in half. Ironing helps a lot here. Sew length of rectangle. Repeat 3 more times. If you have double fold bias tape available, cut 16” and stitch down the center. Elastic may also be used to hold mask in place; cut a 5” piece to make a loop that goes around the ear. Fasten elastic and top and bottom of sides of mask.

©cravendra.org
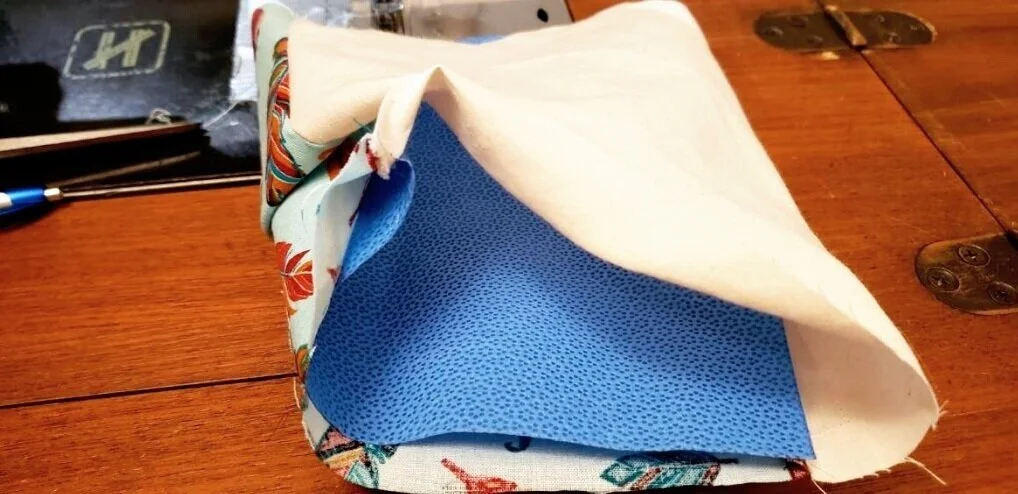
2. The Mask: Place the filter material on the back side of Fabric A (whatever you decide is the front of your mask). Place the right side of Fabric B on top of the right side of Fabric A. Hold or clamp together. You can use clothes pins here. Sew the top and bottom of your square with a straight seam (Be sure to sew through all three layers of front, filter and back) then flip right side out. Smooth hem or iron gently. Don’t put too much heat on the filter material!
©cravendra.org
3. The Pipe Cleaner: Place 2 pipe cleaners at the top edge inside of your square. Clamp in place or pin (I know, we are trying not to pin, but you are going to sew here anyway). Sew around the pipe cleaners as close to it as you can. If you’ve got a sewing foot you can move over to one side, do it. You are trying to encase the little guy on three sides so it can’t get away.
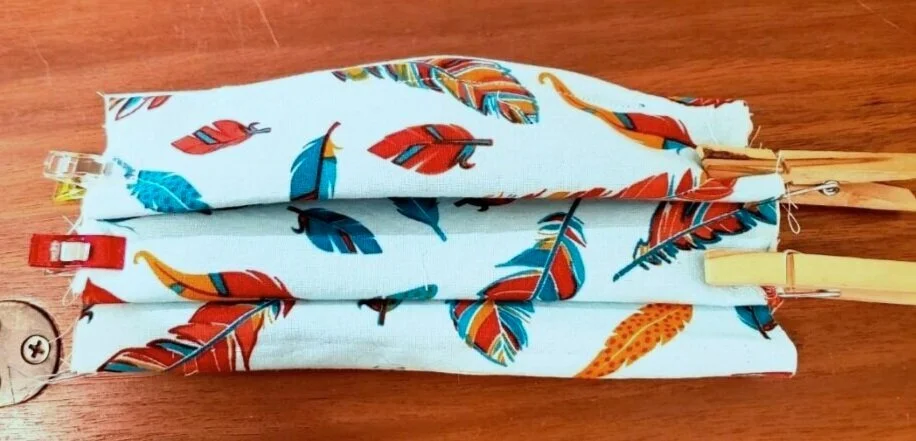
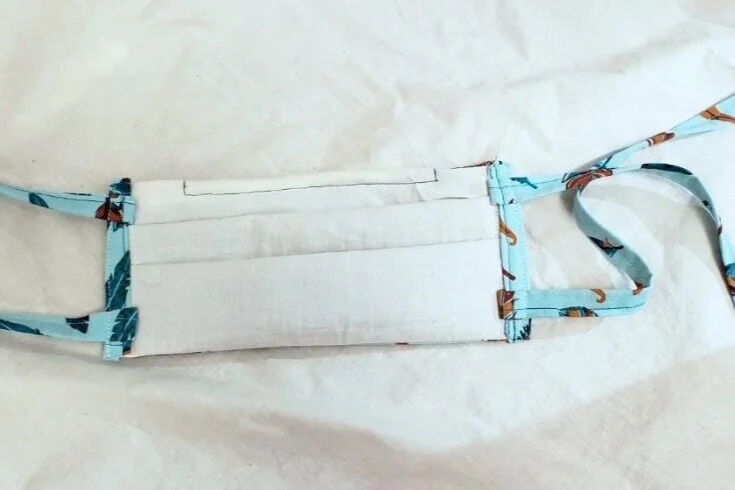
4. The Pleats: Using your fingers, make three pleats on each side of the mask. Try to match the two sides to make it match the prototype. Clamp it and stitch it down.
©cravendra.org

©cravendra.org
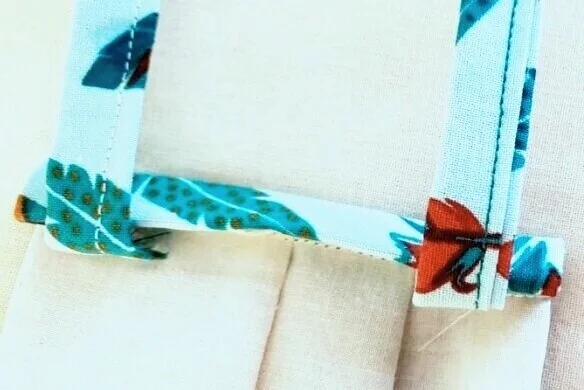
5. Finishing the Ends: Place one of the short rectangles (5” x 2 ½”) over the good side of the mask, right side down. Allow equal selvage (about ½”) to hang over each edge. Sew along edge. Flip rectangle over to back side. Tuck under the ends (ironing helps here). Fold under the raw edge; Tuck finished ties in about 3” evenly apart and sew. Repeat on other side and you are done! You can also finish the ends if you are able to use a zig-zag stitch, by leaving off the end piece and zigzagging the cut ends.
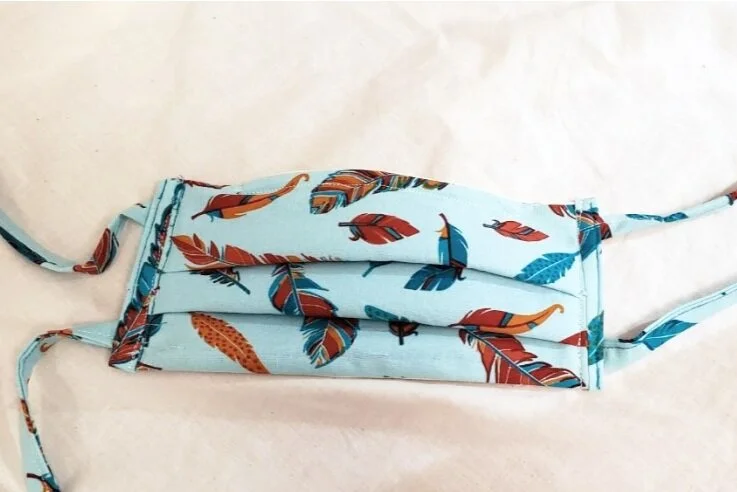
6. Attach Straps or elastic to the sides of the mask. And that’s it!

©cravendra.org